 : +86-139 0587 7291
 Engels
 Spaans
 Russisch
 Frans
Frans Arabisch
 Braziliaans Portugees
 Oekraïens
 Turks
Turks Pools
Pools Nederlands
 Italiaans
 Indonesisch
 Hindi
Hindi اردو
اردو sjoemelen
 अर्नुहोस्थार्नुहोस्
 ไทย
ไทย Molukken
 فارسی
فارسی Sjiek
Sjiek Edelstenen

Mechanische tijdschakelaar: soorten, hoe te gebruiken en meer
Inhoudsopgave
Schakelaar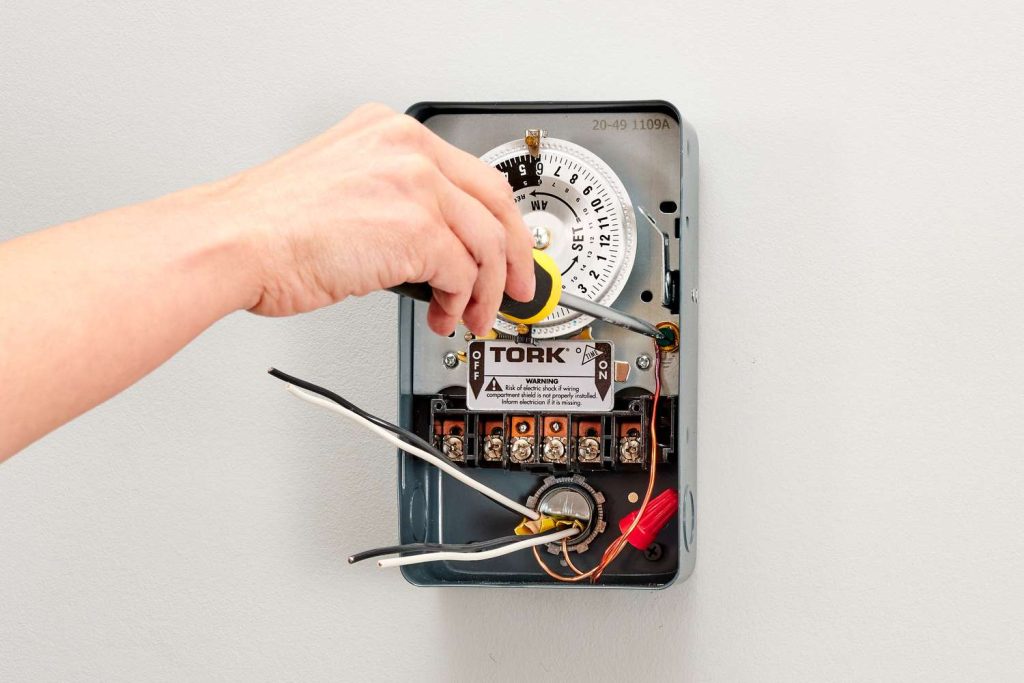
A mechanical timer switch, also referred to as an analog tijdschakelaaris een tijdsapparaat dat gebruikmaakt van fysieke componenten zoals veren, tandwielen en elektromotoren om de stroomtoevoer naar een elektrisch apparaat te regelen.
Om meer te weten te komen over dit apparaat, vindt u hier een praktische gids om aan de slag te gaan.
Hoe werkt een mechanische tijdschakelaar?
Het werkt op analoge wijze en maakt gebruik van een klokmechanisme om te bepalen wanneer de stroom moet worden in- en uitgeschakeld.
Dit type tijdschakelaar wordt handmatig geconfigureerd door aan een knop te draaien om het gewenste tijdsinterval voor het in- of uitschakelen in te stellen.
Hoewel mechanische tijdschakelaars kosteneffectief en eenvoudig te configureren zijn, kunnen ze groter zijn en meer onderhoud vergen vanwege het gebruik van bewegende onderdelen.
Ze worden vaak gebruikt voor het beheer van verlichting, apparaten en andere elektrische apparaten en vormen een economische manier om verschillende systemen te automatiseren.
Ondanks de opkomst van complexere digitale en elektronische timers, blijven mechanische tijdschakelaars een eenvoudige en budgetvriendelijke optie voor het beheren van verlichting en andere apparaten.
Soorten mechanische timers
Mechanical timer switches can be categorized by several factors. Understanding these types helps you choose the right model for your specific application.
By Time Cycle
- 24-Hour Mechanical Timer: The dial completes one full rotation every 24 hours. Best suited for daily routines that repeat the same pattern every day, such as turning porch lights on at dusk and off at dawn. Each pin typically represents a 15-minute block, giving you up to 96 ON/OFF segments per day.
- 7-Day Mechanical Timer: The dial completes one rotation every 7 days, allowing different schedules for weekdays and weekends. Ideal for commercial settings where operating hours vary — for example, a shop sign that needs to stay on later on Fridays and Saturdays.
By Installation Method
- Plug-In Timer: Plugs directly into a standard wall outlet. The appliance then plugs into the timer. No wiring required — ideal for residential use with lamps, fans, aquarium equipment, and small pumps.
- DIN Rail Mounted Timer: Installed inside an electrical panel on a standard DIN rail. Requires a hardwired connection by a qualified electrician. Used in commercial and industrial settings for controlling lighting circuits, irrigation systems, HVAC equipment, and motor-driven machinery.
By Number of Channels
- Single-Channel Timer: Controls one electrical circuit. Sufficient for most residential applications.
- Multi-Channel Timer: Controls two or more independent circuits from a single unit, each with its own ON/OFF schedule. Useful in commercial buildings where multiple systems (e.g., interior lights, exterior signs, ventilation) need independent timing.
By Contact Capacity
- Mechanical timers are rated by the maximum current they can safely switch. Residential plug-in models typically handle 10A–16A, suitable for lighting and small appliances. Industrial DIN rail models — like the TOSUNlux THC-15A — support up to 30A, capable of controlling heavier loads such as pumps, motors, and heating elements.
- When selecting a mechanical timer switch, match the timer’s rated amperage to your load. Connecting a device that draws more current than the timer’s rating will cause overheating and potential failure.
Waar mechanische tijdschakelaars worden gebruikt
Mechanische timerschakelaars zijn veelzijdige apparaten die voor verschillende doeleinden worden gebruikt. Hier is een overzicht van hun toepassingen en voordelen:
- Verlichtingsregeling: Ideaal voor het automatiseren van binnen- en buitenverlichtingssystemen.
- Beheer van apparaten: Handig voor het beheren van apparaten zoals ovens en waterpompen.
- HVAC-bedieningen: Helpt bij het efficiënt regelen van verwarmings- en koelsystemen.
- Kosteneffectief: Biedt een betaalbare oplossing voor het automatiseren van huishoudelijke en industriële systemen.
- Gebruiksvriendelijk: Bekend om hun eenvoud en gebruiksgemak, waardoor ze voor iedereen toegankelijk zijn.
- Duurzaam: Gebouwd om lang mee te gaan en betrouwbaar in verschillende omgevingen.
- Industrieel en thuisgebruik: Geschikt voor zowel residentiële als industriële toepassingen.
Ondanks de aanwezigheid van digitale tijdschakelaarsMechanische tijdschakelaars zijn nog steeds een populaire keuze vanwege hun betaalbaarheid en eenvoudige bediening.
Hoe mechanische timerschakelaars te gebruiken
Om een timer of analoge schakelaar te implementeren, hebt u een bestaand systeem nodig, of het nu op industriële of persoonlijke schaal is.
Voorbeelden van persoonlijke systemen zijn het regelen van aquariummotoren, filters en verlichting.
Terwijl digitale modellen nauwkeurige aanpassingen tot op de seconde mogelijk maken, zijn mechanische analoge tijdklokken gebruiksvriendelijker. Deze geven het begin- en eindpunt aan met inkepingen op een cirkelvormige structuur.
Bij mechanische schakelaars kunnen afwijkingen van + of – 5 minuten voorkomen.
Voor digitale modellen zijn week-, dag- en uurplannen met nauwkeurige minuteninstellingen mogelijk, waardoor u over een gedetailleerde controle beschikt.
De keuze van het juiste type en model timer (digitaal of analoog) hangt af van het doel en de specifieke vereisten van de taak die moet worden uitgevoerd.
Hoe stel je een mechanische tijdschakelaar in?
Om een mechanische tijdschakelaar te configureren, volgt u deze algemene stappen:
- Sluit de timer aan op de muur en sluit het apparaat aan op de timer.
- Draai aan de draaiknop om de huidige tijd in te stellen.
- Press down the pins for the times you want the device to activate, and keep them pulled out for when you want the device to deactivate.
- Indien beschikbaar, stel de timer in op de modus “Aan-Auto-Uit”.
- Zet de handmatige schakelaar op de stand “Timer”.
Deze stappen kunnen enigszins variëren, afhankelijk van het specifieke model van de mechanische tijdschakelaar.
Belangrijk: Raadpleeg altijd de instructies van de fabrikant voor nauwkeurige richtlijnen.
Hoe repareer je een mechanische timerschakelaar die niet werkt?
Om problemen met een defecte mechanische tijdschakelaar op te lossen, kunt u de volgende algemene stappen voor probleemoplossing volgen, afgeleid van de zoekresultaten:
- Stap 1: Controleer de timerinstellingen: Controleer of de timer correct is ingesteld. Onjuiste instellingen kunnen namelijk tot onverwachte storingen leiden.
- Stap 2: Controleer de bedrading van de timer: Zorg voor een goede bedrading en stroomverdeling en voorkom losse aansluitingen die de elektrische stroom kunnen verstoren.
- Stap 3: Controleer op kapotte of vastzittende componenten: Controleer de timer op beschadigde tandwielen of veren, veroorzaakt door factoren zoals leeftijd, vuil of gruis. Smeer vastzittende tandwielen en vervang indien nodig kapotte tandwielen.
- Stap 4: Controle van de voeding en zekering: Controleer of de stroomvoorziening adequaat is en of er geen zekering is doorgebrand. Een te lage spanning of een doorgebrande zekering kan namelijk van invloed zijn op de werking van de timer.
- Stap 5: Batterij vervangen: Als de timer op batterijen werkt, vervang deze dan als het display onduidelijk is of als de timer niet goed functioneert.
- Stap 6: Controleer de uitlijning van de tripper en de versnelling: Inspecteer trippers en tandwielen op schade of verkeerde uitlijning. Reinig tandwielen en zorg voor een goede uitlijning van trippers voor nauwkeurige aan/uit timing.
Raadpleeg altijd de specifieke instructies van de fabrikant voor uitgebreide stappen voor probleemoplossing, aangezien het proces kan variëren afhankelijk van het model mechanische tijdschakelaar.
Belangrijkste conclusie
Analoge of mechanische timers zijn apparaten die de werking van elektrische machines of systemen regelen, door ze in en uit te schakelen op basis van een vooraf bepaald schema.
Het hoofddoel is energiebesparing, waardoor timers een praktische keuze zijn.
Door energieverbruikende apparaten uit te schakelen wanneer u ze niet nodig hebt, bespaart u niet alleen energie, maar vergroot u ook het gebruiksgemak.
Deze bewuste aanpak van het regelen van de werking van apparaten draagt bij aan zowel de energie-efficiëntie als de professionaliteit van het systeem.
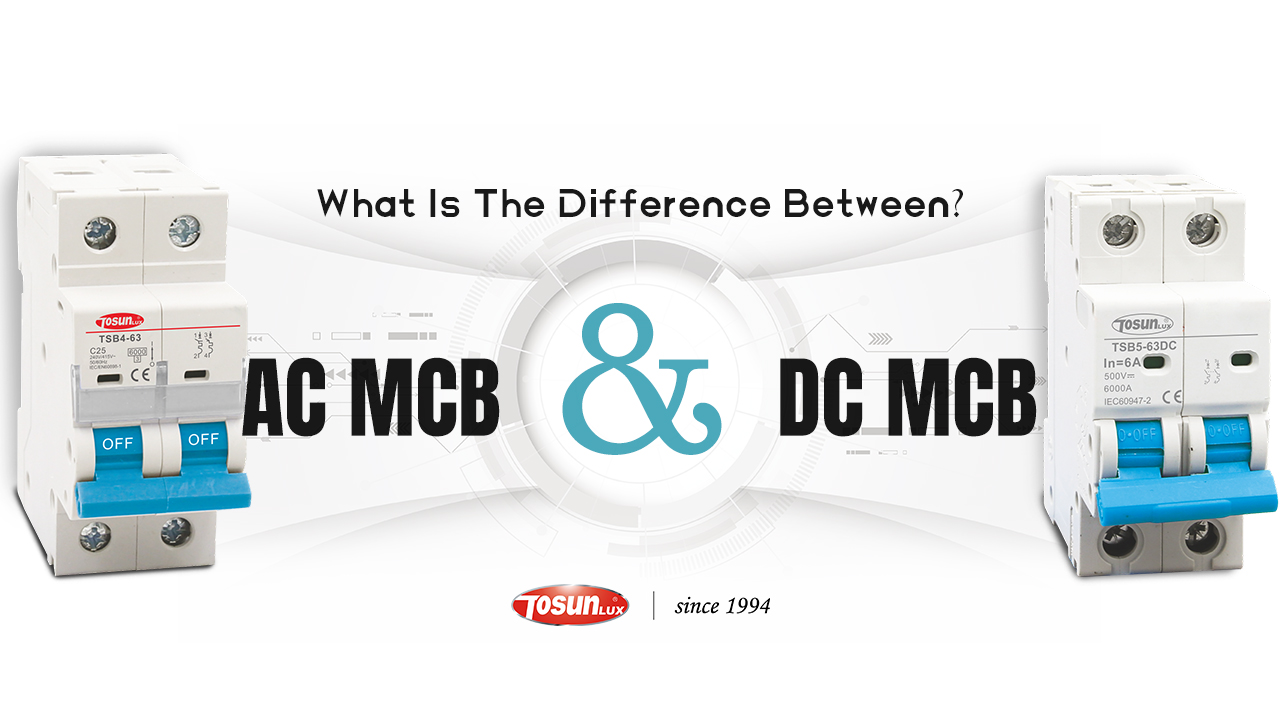
Mechanical Timer Switch vs Digital Timer Switch
Mechanical Timer Switch vs Digital Timer Switch
Both mechanical (analog) and digital timer switches serve the same fundamental purpose — automating when electrical devices turn on and off. However, they differ significantly in how they achieve this. Here is a practical comparison to help you choose the right type.
| Functie | Mechanische tijdschakelaar | Digital Timer Switch |
| Timing Accuracy | ±5 minutes | ±1 second |
| Programming Method | Push physical pins on a dial | Button-based, LCD screen interface |
| Minimum Time Interval | 15 minutes (per pin) | 1 minute or 1 second |
| Number of Programs | Simple daily schedules, budget installations, and environments without reliable power | 8–20+ independent programs |
| Weekday/Weekend Scheduling | Only on 7-day models | Standard on most models |
| Power Outage Behavior | Schedule shifts by outage duration (no battery) | Battery backup retains schedule (typically 3V lithium) |
| Price Range | $5 – $20 (residential); $15 – $50 (industrial) | $15 – $60 (residential); $30 – $120 (industrial) |
| Levensduur | 5–10 years (moving parts wear over time) | 8–15 years (no moving parts) |
| Onderhoud | Periodic cleaning and lubrication of gears | Minimal; battery replacement every 3–5 years |
| Lawaai | Faint ticking/clicking from motor and gears | Silent |
| Ease of Setup | Very easy — push pins, no manual needed | Moderate — requires reading the manual to program |
| Het beste voor | Simple daily schedules, budget installations, environments without reliable power | Complex multi-program schedules, second-level precision, setups with frequent power outages |
When to Choose Mechanical: If your application follows a simple, repeating daily pattern (e.g., lights on at 6 PM, off at 11 PM every day) and you want the lowest upfront cost with zero programming complexity, a mechanical timer is the practical choice.
When to Choose Digital: If you need different schedules for different days of the week, second-level precision, or the schedule must survive power outages without resetting, a digital timer is worth the extra cost.
TOSUNlux offers both types. The THC-15A digital programmable timer supports 24-hour / 7-day scheduling with a contact capacity of up to 30A, making it suitable for both light and heavy-duty applications.
Productaanbeveling

TOSUNlux THC-15A Programmable Timer Switch
Based on the requirements discussed throughout this guide, the TOSUNlux THC-15A is a versatile option that bridges the gap between simple mechanical timers and fully programmable digital controllers.
Key Specifications:
| Specificatie | Detail |
| Timer Type | Digital programmable |
| Time Cycle | 24-hour and 7-day scheduling |
| Contactcapaciteit | 16A – 30A |
| Minimum Program Interval | 1 minute |
| Number of ON/OFF Programs | Up to 17 per day |
| Montage | DIN rail (35mm standard) |
| Power Outage Protection | Built-in lithium battery backup |
| Weergave | LCD with backlight |
Why It Fits Common Use Cases
- For lighting control: Supports separate weekday and weekend schedules, eliminating the manual adjustment needed with basic mechanical timers.
- For industrial motor control: The 30A contact capacity handles pumps, fans, and motors without requiring an external contactor for loads under 30A.
- For environments with frequent power outages: The battery backup retains your programmed schedule, so you do not need to reset the timer after every blackout.
TOSUNlux also manufactures circuit breakers, contactors, isolating switches, and distribution boards. Visit tosunlux.eu to request a quotation or browse the full product catalog.
Veelgestelde vragen
Q1: How long does a mechanical timer switch last?
A well-maintained mechanical timer switch typically lasts 5 to 10 years. Lifespan depends on usage frequency, environmental conditions, and regular maintenance of moving parts like gears and springs. Timers used in dusty or humid environments may require more frequent cleaning to reach their full lifespan.
Q2: Can I use a mechanical timer switch outdoors?
Yes, but you need an outdoor-rated model with an appropriate IP rating — typically IP44 or higher — to protect against moisture and dust. Always install outdoor timers inside a weatherproof enclosure, and avoid direct exposure to rain or sprinkler spray.
Q3: What is the difference between a mechanical and a digital timer switch?
Mechanical timer switches use physical gears and springs with ±5-minute accuracy, while digital timers use electronic circuits for precision down to the second. Mechanical timers are more affordable and easier to set up, while digital timers offer more programming flexibility and battery-backed memory that survives power outages.
Q4: Why is my mechanical timer switch not turning off?
Common causes include stuck or misaligned pins (trippers), worn-out gears, or a faulty switch contact. First check that the pins for OFF periods are fully in the raised position. Then inspect the mechanism for debris or gear damage. If the timer motor is running but the switch does not disengage, the internal contact may be welded shut from switching high-current loads — in this case, replace the timer.
Q5: How do I reset a mechanical timer switch?
Pull all pins (trippers) to the OFF (raised) position, then rotate the dial clockwise until the arrow aligns with the correct current time. After that, push down only the pins for your desired ON periods. Finally, set the mode switch to “Auto” or “Timer” to activate the schedule.
Q6: Can a mechanical timer switch save electricity?
Yes. By automatically turning off devices when they are not needed — such as lights, pumps, and heaters — a mechanical timer can reduce energy waste by 10% to 30%, depending on the application and how many hours per day the device was previously running unnecessarily.
Q7: What is the maximum load for a mechanical timer switch?
Most residential plug-in mechanical timers handle 10A to 16A (approximately 1,150W to 1,840W at 115V, or 2,200W to 3,520W at 220V). Industrial DIN rail models like the TOSUNlux THC-15A support up to 30A. Always check the timer’s rated current on its label before connecting any appliance, and never exceed the stated capacity.
Telefoon: +86-577-88671000
E-mailadres: ceo@tosun.com
Skype: tosunelectric
WeChat: +86-139 6881 9286
WhatsApp: +86-139 0587 7291
Adres: Kamer nr. 1001 Wenzhou Fortune Center, Station Road, Wenzhou, China
VRAAG EEN OFFERTE AAN
WhatsApp ons