 : +86-139 0587 7291
 English
 Español
 Русский
 Français
 العربية
 Português do Brasil
 Українська
 Türkçe
 Polski
 Nederlands
 Italiano
 Bahasa Indonesia
 हिन्दी
 اردو
اردو አማርኛ
አማርኛ Հայերեն
 ไทย
ไทย Монгол
 فارسی
فارسی Shqip
Shqip Ελληνικά

How to Add a Sub Panel Breaker Box?
Table of Contents
ToggleSub-panels direct electrical power to different parts of the premises. They perform the same functions as the main panel. They protect electrical appliances from being fried by power surges.
These sub-panels contain a series of circuit breakers and fuses that interrupt the flow of electricity when a large current passes through them.
A sub-panel can provide 120V or 240V. It can be either a single-pole or two-pole circuit breaker. If you’re using a single-pole breaker, you can attach it to the ground wire.
If you want to add a subpanel breaker box, we can help you. Follow this step by step to easily add a subpanel.
What Is A Sub Panel Breaker Box?
The electrical subpanel is a critical part of your home’s electrical system. While it is very similar to the main breaker panel, it also has its own unique functions. Its primary role is to protect your home from electricity surges, and it can also prevent electrocution in emergency situations. This box is a great place to keep important tools and items such as fuses.
When upgrading a home’s electrical service, a subpanel can provide an expansion for an existing full breaker box. You can use a subpanel as an extra outlet for a new circuit. It is important to consider the size of your current system to determine whether it can accommodate a subpanel. You can also use a subpanel to replace an older one and add convenience and space to install new circuits.
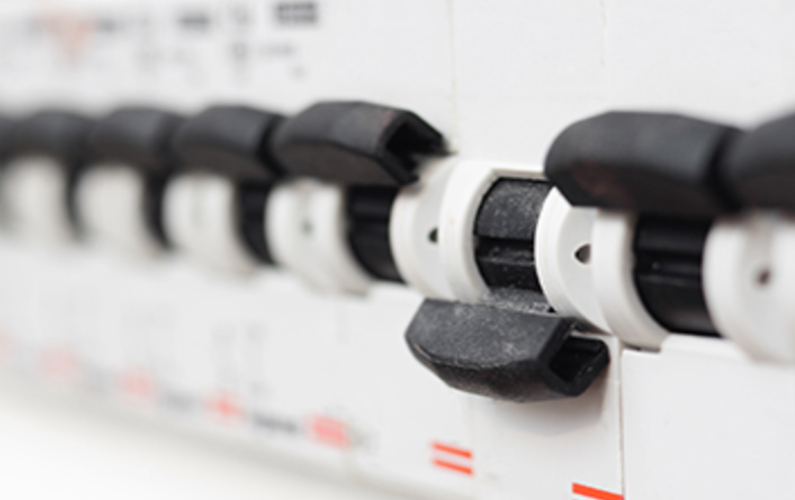
The main breaker box is used for protecting a home from power surges. A sub-panel is a secondary breaker box that is used for separate areas of the building. A sub-panel allows you to isolate electrical systems in different locations of your home. You can use a sub-panel to protect different parts of your home from damage. The main breaker panel is made up of two rows of circuit breakers. Each row is connected to a hot bus bar, which flows to branching circuits and outlets.
Reasons to Install a Subpanel in Your Home
You’re probably already aware that your main electrical panel has circuit breakers, but a subpanel can reduce the amount of circuit wiring that needs to be run. It also can help prevent electrical overloads. Here are a few reasons why you might want to consider installing a new subpanel in your home. Having an expert electrician install a new subpanel is a wise choice for safety, and you can expect your home to run more smoothly.
Adding a subpanel to your home can improve the efficiency and safety of your electrical system. It can also solve space issues on the main panel. Adding a new addition, like a garage, workshop, or addition will also create the need for additional electrical power. A subpanel can be a great idea if you don’t have enough space for a full-sized panel.
Besides improving your home’s safety, a subpanel can improve the efficiency and flexibility of your electrical system. It can also solve the space problem on your main panel. You may need additional electrical power due to an addition. You may want to install an outlet for a small TV or to install a workshop in your garage. Having an extra outlet for an extension cord can be a great idea too.
Safety Considerations When Adding a Sub Panel Breaker Box
If you are planning to add a sub-panel breaker box, you must consider a few important safety precautions. It is not advisable to install inflammable panel materials in an area that may have moisture. The smallest mistake that you can make could result in a fire. Therefore, you should turn off the electricity in the room before starting any project. This will ensure your safety.
Moreover, it is important to ensure that your new sub-panel is installed properly and safely. You must follow codes and guidelines before you install it. You should also seek the services of a qualified electrician to install your sub-panel. This will ensure that the wiring and breaker sizes are appropriate for your new sub-panel. A qualified electrician should be able to perform this work.
How to Install an Electrical Subpanel?
How to install an electrical subpanel is a basic DIY project that most people can handle. Typically, a subpanel is fed by a double-pole 240V circuit breaker in the main service panel. The subpanel then divides the single feed circuit into branch circuits. Here are the steps you need to follow in order to install an electrical subpanel.
- Step 1: Mount Subpanel
To mount a subpanel, you first need to find a location that will allow you to reach it from the ceiling. It should not be too high or too low. Then, you should purchase the appropriate wire gauge for your amperage rating. Once you’ve decided on a location for your electrical subpanel, you’ll need to find a suitable wall stud. The subpanel should be near the main panel so that you can easily pull wires. Determine how the wires are going to travel to the panel. You need a remove a knockout slug so that the wires can be pulled.
- Step 2: Plan Route
There are many factors to consider when planning a route to install an electrical subpanel in your home. Once you’ve determined the size of your subpanel, determine how to plan the route to install it. To plan the route, you need to open the main panel. Plan the router for four wires in the panel, i.e., two hot wires, one neutral wire and one ground wire. Now, you need to remove the knockout slug, strip the wires and clamp the cable. You need to connect the neutral and ground wires to bus bars.
- Step 3: Strip Wires
To properly install an electrical subpanel, you strip red and black wires. It will make your job much easier. There are several steps to strip wires. You need to route wires, cut and strip them and connect them to the feeder breaker. After that, you need to snap the breaker into place.
- Step 4: Connect Wires
Now, you need to connect the feeder wires in the sub-panel. You need to router, cut and strip the wires. After that, you need to connect it to the terminal. You need to connect the red and black wires to hot bus bars. Apart from that, connect neutral wire to the neutral terminal and ground wire to the bus bar.
- Step 5: Finish Connecting Wires
In the end, you just need to run the cable for the new circuits. Route the wires for each circuit and connect the ground wire, neutral wire and hot wire. The hot wire will be connected to the circuit breaker. The neutral wire will be connected to the neutral bus bar. The ground wire will be connected to the ground bus bar.


Tel: +86-577-88671000
E-mail: ceo@tosun.com
Skype: tosunelectric
Wechat: +86-139 6881 9286
WhatsApp: +86-139 0587 7291
Address: Room No.1001 Wenzhou Fortune Center,Station Road, Wenzhou, China
REQUEST A QUOTE
WhatsApp us