 : +86-139 0587 7291
 English
 Español
 Русский
 Français
 العربية
 Português do Brasil
 Українська
 Türkçe
 Polski
 Nederlands
 Italiano
 Bahasa Indonesia
 हिन्दी
 اردو
اردو አማርኛ
አማርኛ Հայերեն
 ไทย
ไทย Монгол
 فارسی
فارسی Shqip
Shqip Ελληνικά

Mechanical Timer Switch: Types, How To Use & More
Table of Contents
Toggle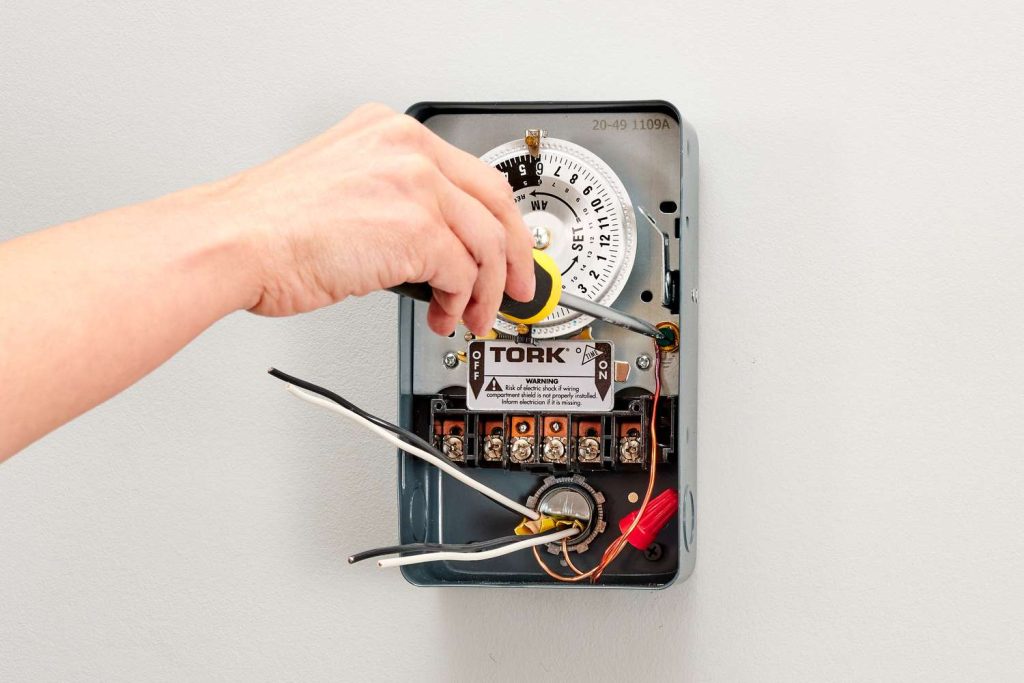
A mechanical timer switch, also referred to as an analog timer switch, is a timing device that employs physical components like springs, gears, and electric motors to regulate the power supply to an electrical device.
To learn more about this device, here’s a practical guide to get started.
How Does A Mechanical Timer Switch Work?
Operating in an analog manner, it utilizes clockwork mechanisms to determine when to switch the power on and off.
This type of timer switch is manually configured by adjusting a knob to set the desired time interval for powering on or off.
Although mechanical timer switches are cost-effective and straightforward to configure, they may be larger and require more maintenance due to the utilization of moving parts.
Commonly employed for managing lighting, appliances, and other electrical devices, they offer an economical means of automating various systems.
Despite the emergence of more intricate digital and electronic timers, mechanical timer switches remain a simple and budget-friendly option for overseeing lights and other devices.
Types of Mechanical Timers
Mechanical timer switches can be categorized by several factors. Understanding these types helps you choose the right model for your specific application.
By Time Cycle
- 24-Hour Mechanical Timer: The dial completes one full rotation every 24 hours. Best suited for daily routines that repeat the same pattern every day, such as turning porch lights on at dusk and off at dawn. Each pin typically represents a 15-minute block, giving you up to 96 ON/OFF segments per day.
- 7-Day Mechanical Timer: The dial completes one rotation every 7 days, allowing different schedules for weekdays and weekends. Ideal for commercial settings where operating hours vary — for example, a shop sign that needs to stay on later on Fridays and Saturdays.
By Installation Method
- Plug-In Timer: Plugs directly into a standard wall outlet. The appliance then plugs into the timer. No wiring required — ideal for residential use with lamps, fans, aquarium equipment, and small pumps.
- DIN Rail Mounted Timer: Installed inside an electrical panel on a standard DIN rail. Requires a hardwired connection by a qualified electrician. Used in commercial and industrial settings for controlling lighting circuits, irrigation systems, HVAC equipment, and motor-driven machinery.
By Number of Channels
- Single-Channel Timer: Controls one electrical circuit. Sufficient for most residential applications.
- Multi-Channel Timer: Controls two or more independent circuits from a single unit, each with its own ON/OFF schedule. Useful in commercial buildings where multiple systems (e.g., interior lights, exterior signs, ventilation) need independent timing.
By Contact Capacity
- Mechanical timers are rated by the maximum current they can safely switch. Residential plug-in models typically handle 10A–16A, suitable for lighting and small appliances. Industrial DIN rail models — like the TOSUNlux THC-15A — support up to 30A, capable of controlling heavier loads such as pumps, motors, and heating elements.
- When selecting a mechanical timer switch, match the timer’s rated amperage to your load. Connecting a device that draws more current than the timer’s rating will cause overheating and potential failure.
Where Mechanical Timer Switches Are Used
Mechanical timer switches are versatile devices used for various purposes. Here’s a breakdown of their uses and benefits:
- Lighting Control: Ideal for automating indoor and outdoor lighting systems.
- Appliance Management: Useful for managing appliances like ovens and water pumps.
- HVAC Controls: Helps in regulating heating and cooling systems efficiently.
- Cost-Effective: Provides an affordable solution for automating home and industrial systems.
- User-Friendly: Known for their simplicity and ease of use, making them accessible to everyone.
- Durable: Built to last, offering reliability in various settings.
- Industrial and Home Use: Suitable for both residential and industrial applications.
Despite the presence of digital timer switches, mechanical timer switches continue to be a popular choice due to their affordability and straightforward operation.
How to Use Mechanical Timer Switches
To implement a timer or analog switch, you need an existing system, whether on an industrial or personal scale.
Examples of personal systems include regulating aquarium motors, filters, and lights.
While digital models allow precise adjustments down to the second, mechanical analog time clocks are user-friendly, indicating the start and end points with notches on a circular structure.
Deviations of + or – 5 minutes may occur in mechanical switches.
For digital models, weekly, daily, and hourly plans with precise minute settings are possible, providing detailed control.
Selecting the appropriate timer type and model—digital or analog—depends on the purpose and specific requirements of the task at hand.
How to Set a Mechanical Timer Switch
To configure a mechanical timer switch, follow these general steps:
- Connect the timer to the wall and the appliance to the timer.
- Adjust the dial to set the current time.
- Press down the pins for the times you want the device to activate, and keep them pulled out for when you want the device to deactivate.
- If available, set the timer to “On-Auto-Off” mode.
- Switch the manual switch button to the “Timer” setting.
These steps might vary slightly based on the specific model of the mechanical timer switch.
Important: Always consult the manufacturer’s instructions for precise guidance.
How to Fix a Mechanical Timer Switch That Is Not Working
To address issues with a malfunctioning mechanical timer switch, consider these general troubleshooting steps derived from search results:
- Step 1: Verify Timer Settings: Confirm that the timer is correctly set, as incorrect settings can lead to unexpected malfunctions.
- Step 2: Check Timer Wiring: Ensure proper wiring and power distribution, addressing loose terminals that might disrupt the electrical flow.
- Step 3: Inspect for Broken or Stuck Components: Examine the timer for damaged gears or springs, caused by factors like age, dirt, or debris. Lubricate stuck gears, and replace broken ones if necessary.
- Step 4: Power Supply and Fuse Verification: Confirm an adequate power supply and check for a blown fuse, as insufficient voltage or a blown fuse can impact the timer’s operation.
- Step 5: Battery Replacement: If the timer relies on batteries, replace them if the display is unclear or if the timer isn’t functioning correctly.
- Step 6: Examine Tripper and Gear Alignment: Inspect trippers and gears for damage or misalignment. Clean gears and ensure proper alignment of trippers for accurate on/off timing.
Always consult the specific manufacturer’s instructions for comprehensive troubleshooting steps, as the process may vary depending on the mechanical timer switch model.
Key Takeaway
Analog or mechanical timers are devices that manage the operation of electrical machines or systems, turning them on and off based on a predetermined schedule.
The primary goal is energy conservation, making timers a practical choice.
By stopping energy-consuming devices when they’re not needed, you not only save electricity but also enhance user convenience.
This deliberate approach to controlling device operation contributes to both energy efficiency and system professionalism.
Mechanical Timer Switch vs Digital Timer Switch
Mechanical Timer Switch vs Digital Timer Switch
Both mechanical (analog) and digital timer switches serve the same fundamental purpose — automating when electrical devices turn on and off. However, they differ significantly in how they achieve this. Here is a practical comparison to help you choose the right type.
| Feature | Mechanical Timer Switch | Digital Timer Switch |
| Timing Accuracy | ±5 minutes | ±1 second |
| Programming Method | Push physical pins on a dial | Button-based, LCD screen interface |
| Minimum Time Interval | 15 minutes (per pin) | 1 minute or 1 second |
| Number of Programs | Simple daily schedules, budget installations, and environments without reliable power | 8–20+ independent programs |
| Weekday/Weekend Scheduling | Only on 7-day models | Standard on most models |
| Power Outage Behavior | Schedule shifts by outage duration (no battery) | Battery backup retains schedule (typically 3V lithium) |
| Price Range | $5 – $20 (residential); $15 – $50 (industrial) | $15 – $60 (residential); $30 – $120 (industrial) |
| Lifespan | 5–10 years (moving parts wear over time) | 8–15 years (no moving parts) |
| Maintenance | Periodic cleaning and lubrication of gears | Minimal; battery replacement every 3–5 years |
| Noise | Faint ticking/clicking from motor and gears | Silent |
| Ease of Setup | Very easy — push pins, no manual needed | Moderate — requires reading the manual to program |
| Best For | Simple daily schedules, budget installations, environments without reliable power | Complex multi-program schedules, second-level precision, setups with frequent power outages |
When to Choose Mechanical: If your application follows a simple, repeating daily pattern (e.g., lights on at 6 PM, off at 11 PM every day) and you want the lowest upfront cost with zero programming complexity, a mechanical timer is the practical choice.
When to Choose Digital: If you need different schedules for different days of the week, second-level precision, or the schedule must survive power outages without resetting, a digital timer is worth the extra cost.
TOSUNlux offers both types. The THC-15A digital programmable timer supports 24-hour / 7-day scheduling with a contact capacity of up to 30A, making it suitable for both light and heavy-duty applications.
Product Recommendation

TOSUNlux THC-15A Programmable Timer Switch
Based on the requirements discussed throughout this guide, the TOSUNlux THC-15A is a versatile option that bridges the gap between simple mechanical timers and fully programmable digital controllers.
Key Specifications:
| Specification | Detail |
| Timer Type | Digital programmable |
| Time Cycle | 24-hour and 7-day scheduling |
| Contact Capacity | 16A – 30A |
| Minimum Program Interval | 1 minute |
| Number of ON/OFF Programs | Up to 17 per day |
| Mounting | DIN rail (35mm standard) |
| Power Outage Protection | Built-in lithium battery backup |
| Display | LCD with backlight |
Why It Fits Common Use Cases
- For lighting control: Supports separate weekday and weekend schedules, eliminating the manual adjustment needed with basic mechanical timers.
- For industrial motor control: The 30A contact capacity handles pumps, fans, and motors without requiring an external contactor for loads under 30A.
- For environments with frequent power outages: The battery backup retains your programmed schedule, so you do not need to reset the timer after every blackout.
TOSUNlux also manufactures circuit breakers, contactors, isolating switches, and distribution boards. Visit tosunlux.eu to request a quotation or browse the full product catalog.
FAQ
Q1: How long does a mechanical timer switch last?
A well-maintained mechanical timer switch typically lasts 5 to 10 years. Lifespan depends on usage frequency, environmental conditions, and regular maintenance of moving parts like gears and springs. Timers used in dusty or humid environments may require more frequent cleaning to reach their full lifespan.
Q2: Can I use a mechanical timer switch outdoors?
Yes, but you need an outdoor-rated model with an appropriate IP rating — typically IP44 or higher — to protect against moisture and dust. Always install outdoor timers inside a weatherproof enclosure, and avoid direct exposure to rain or sprinkler spray.
Q3: What is the difference between a mechanical and a digital timer switch?
Mechanical timer switches use physical gears and springs with ±5-minute accuracy, while digital timers use electronic circuits for precision down to the second. Mechanical timers are more affordable and easier to set up, while digital timers offer more programming flexibility and battery-backed memory that survives power outages.
Q4: Why is my mechanical timer switch not turning off?
Common causes include stuck or misaligned pins (trippers), worn-out gears, or a faulty switch contact. First check that the pins for OFF periods are fully in the raised position. Then inspect the mechanism for debris or gear damage. If the timer motor is running but the switch does not disengage, the internal contact may be welded shut from switching high-current loads — in this case, replace the timer.
Q5: How do I reset a mechanical timer switch?
Pull all pins (trippers) to the OFF (raised) position, then rotate the dial clockwise until the arrow aligns with the correct current time. After that, push down only the pins for your desired ON periods. Finally, set the mode switch to “Auto” or “Timer” to activate the schedule.
Q6: Can a mechanical timer switch save electricity?
Yes. By automatically turning off devices when they are not needed — such as lights, pumps, and heaters — a mechanical timer can reduce energy waste by 10% to 30%, depending on the application and how many hours per day the device was previously running unnecessarily.
Q7: What is the maximum load for a mechanical timer switch?
Most residential plug-in mechanical timers handle 10A to 16A (approximately 1,150W to 1,840W at 115V, or 2,200W to 3,520W at 220V). Industrial DIN rail models like the TOSUNlux THC-15A support up to 30A. Always check the timer’s rated current on its label before connecting any appliance, and never exceed the stated capacity.
Tel: +86-577-88671000
E-mail: ceo@tosun.com
Skype: tosunelectric
Wechat: +86-139 6881 9286
WhatsApp: +86-139 0587 7291
Address: Room No.1001 Wenzhou Fortune Center,Station Road, Wenzhou, China
REQUEST A QUOTE
WhatsApp us